Welcome to my first X Article and Proxmox guide. I plan to do more of these in the future, so let me know what you think!
Note: I am by no means an expert in this stuff, so what I did here may not be the most optimal setup, but it’s what worked for me, and I hope you can get some value from it!
First Enable IOMMU
Boot into your BIOS and enable IOMMU (or the Intel equivalent). The location of this setting is very BIOS-dependent; for me, it was in “Advanced Mode” > Settings > Miscellaneous.
Reboot and log in to your Proxmox host. Edit your grub config and add the IOMMU boot parameter.
nano /etc/default/grubGRUB_CMDLINE_LINUX_DEFAULT="quiet iommu=pt"For Intel CPUs:
GRUB_CMDLINE_LINUX_DEFAULT="quiet intel_iommu=on iommu=pt"Generate a new grub config file, and reboot.
update-grubLoad the VFIO modules
Edit/Create a vfio.conf file
nano /etc/modules-load.d/vfio.confAnd add:
vfio
vfio_iommu_type1
vfio_pci
Now, to stop the Proxmox host from claiming the GPU, run the following commands:
echo "blacklist radeon" >> /etc/modprobe.d/blacklist.conf
echo "blacklist nouveau" >> /etc/modprobe.d/blacklist.conf
echo "blacklist nvidia" >> /etc/modprobe.d/blacklist.conf
Add the GPU to VFIO
We need to get the Vendor ID of your GPU and add it to VFIO. Run the following command:
lspciThis will print a bunch of stuff. Find your GPU in this mess; it should look something like this:
01:00.0 VGA compatible controller: NVIDIA Corporation AD104 [GeForce RTX 4070] (rev a1)
01:00.1 Audio device: NVIDIA Corporation AD104 High Definition Audio Controller (rev a1)
Note the first set of numbers, for me it’s 01:00. Run the following command, making sure to replace 01:00 with whatever your specific card has:
lspci -n -s 01:00You should now see the Vendor IDs for your GPU; it should look something like this:
01:00.0 0300: 10de:2786 (rev a1)
01:00.1 0403: 10de:22bc (rev a1)
We need to add these IDs to VFIO. You can do this with the following command. Make sure to add the IDs for your specific card!
echo "options vfio-pci ids=10de:2786,10de:22bc disable_vga=1"> /etc/modprobe.d/vfio.confUpdate and reboot
update-initramfs -u
reboot
And that’s it for the setup! Assuming you did everything right, your Proxmox host is ready for GPU passthrough!
The VM
Now to actually create the VM, personally I chose Windows 11 for this (i know im sorry), but the VM configs should be relatively the same for Linux. The only thing really Windows specific here is the Sunshine configuration, which unfortunately I have yet to master on Linux :(
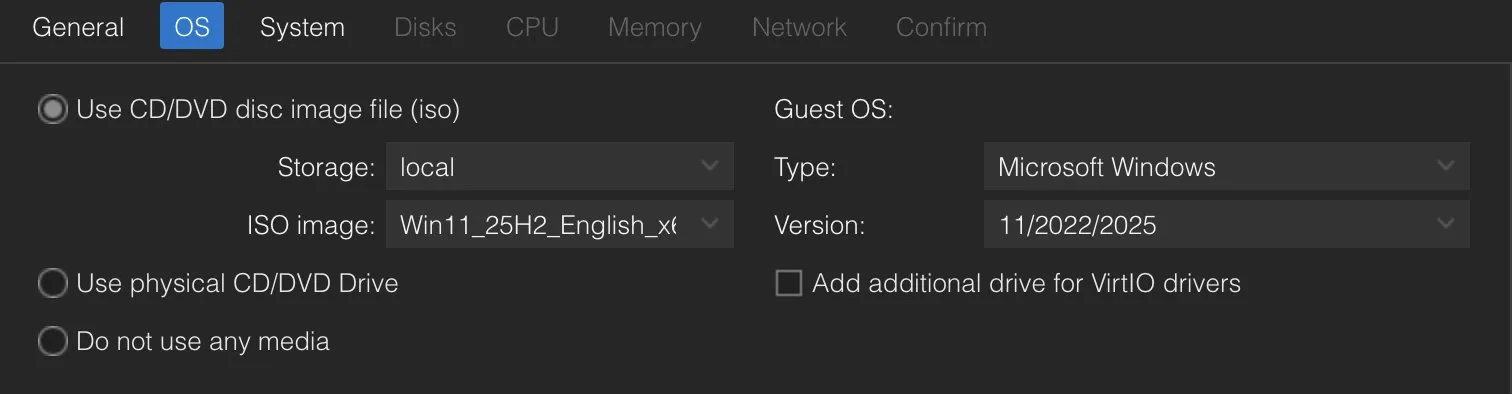
Assuming you already have the ISO downloaded, create a new VM. You can leave the general tab as is, or edit it however you want. Under OS, set the disc image and guest OS type. Don’t worry about the additional drive for VirtIO drivers; we will install it later.
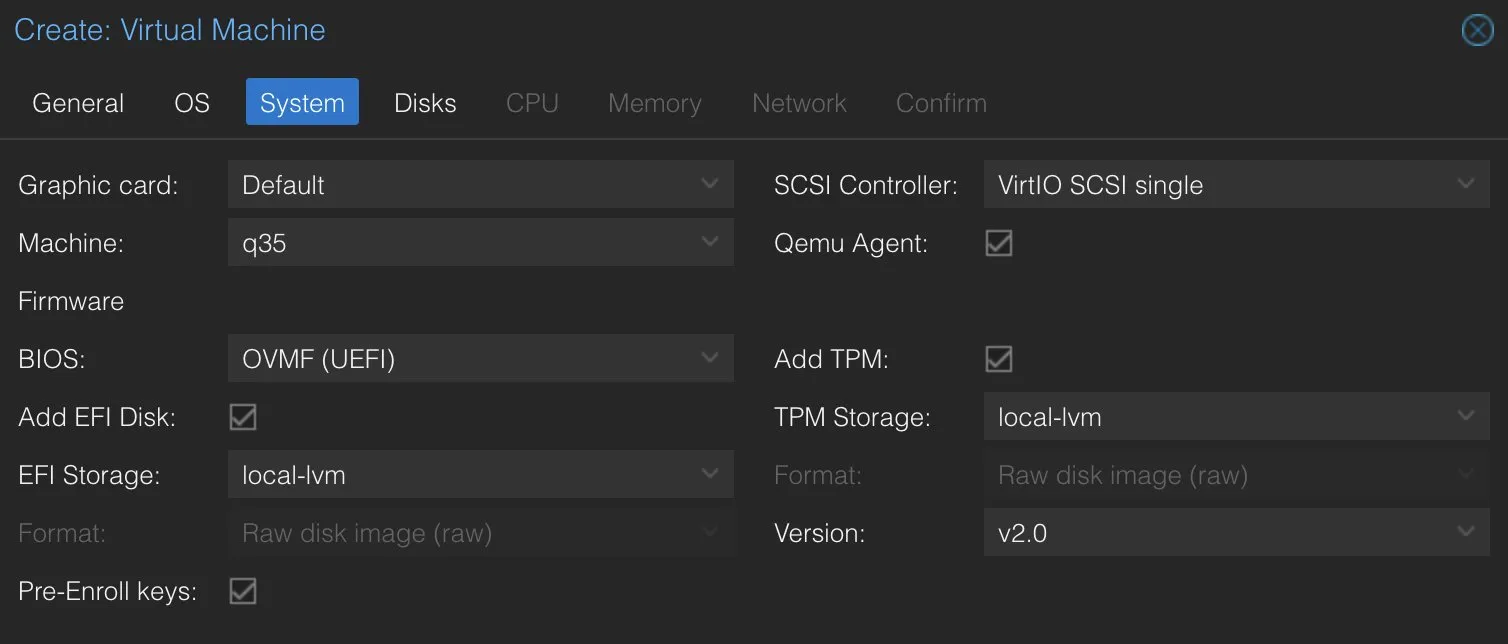
For system, set the machine to q35 and the BIOS to OVMF (UEFI), and make sure to enable TPM for Windows 11.
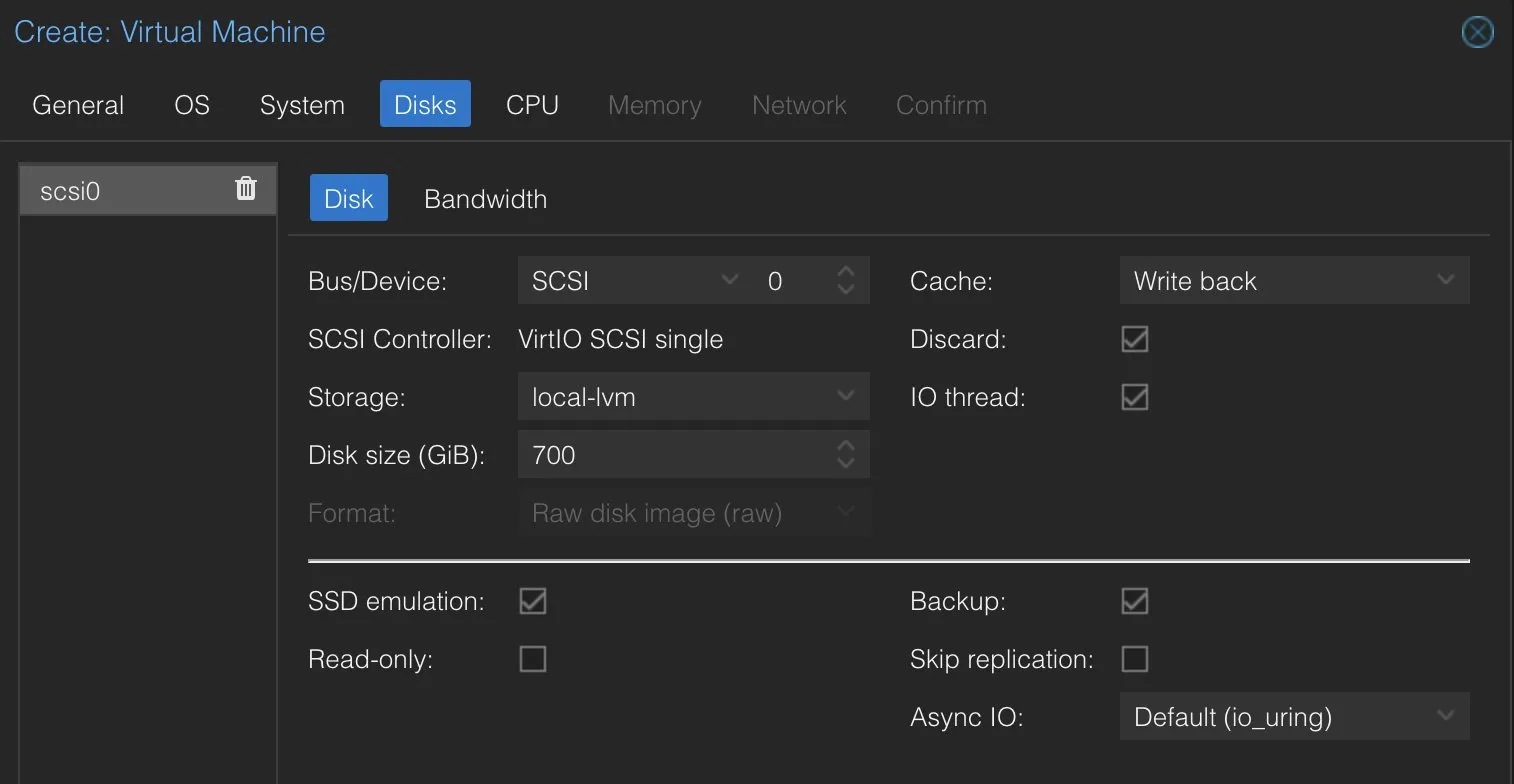
For disks, choose any size you want, and make sure you enable SSD emulation.
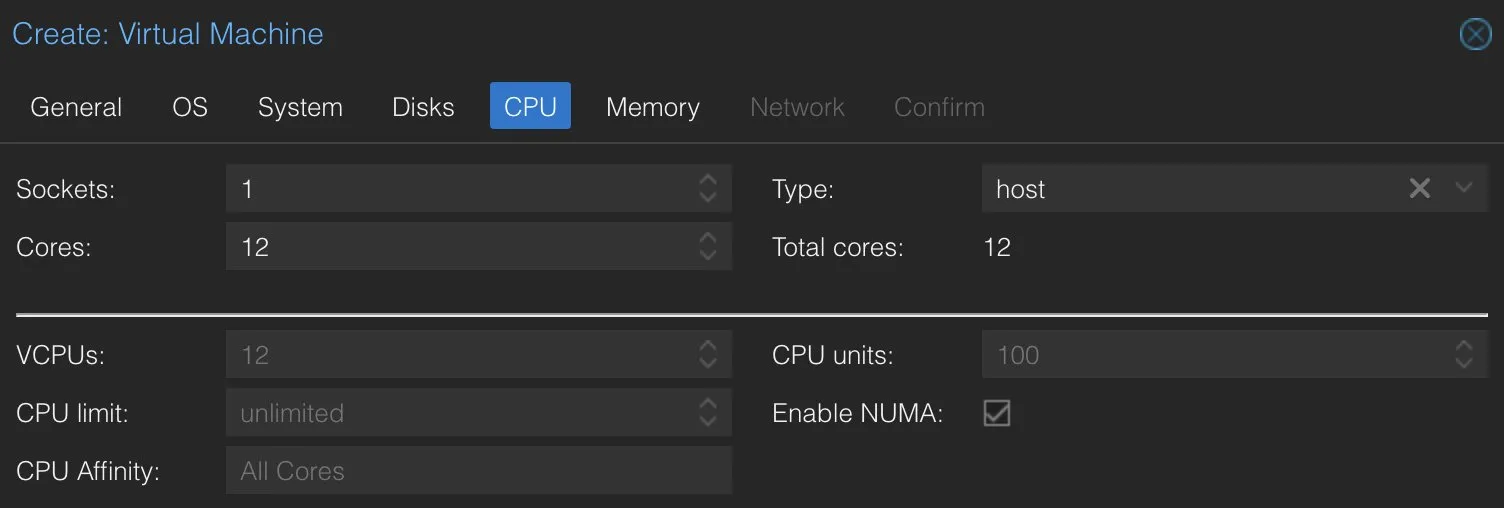
Onto CPU, use 1 socket, allocate as many cores as you want, and set the CPU type to host. I’m using a Ryzen 9 7900x, which has 24 threads, so 12 cores allocated to the VM should be plenty and will leave headroom for other VMs.
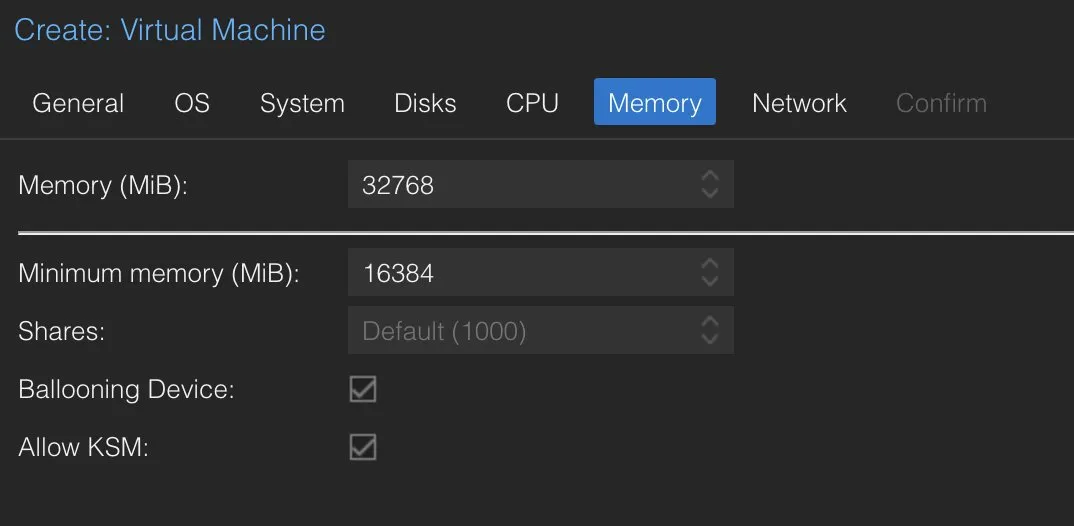
For memory, I’m allocating 32GB out of my 64GB, and using ballooning (optional) because most of this RAM will be sitting unused. This will give the host the ability to allocate 16GB to other VMs when Windows doesn’t need it.
Note: Ballooning is known to harm VM performance, but for me, it’s worth it as I am running many other VMs on this host.
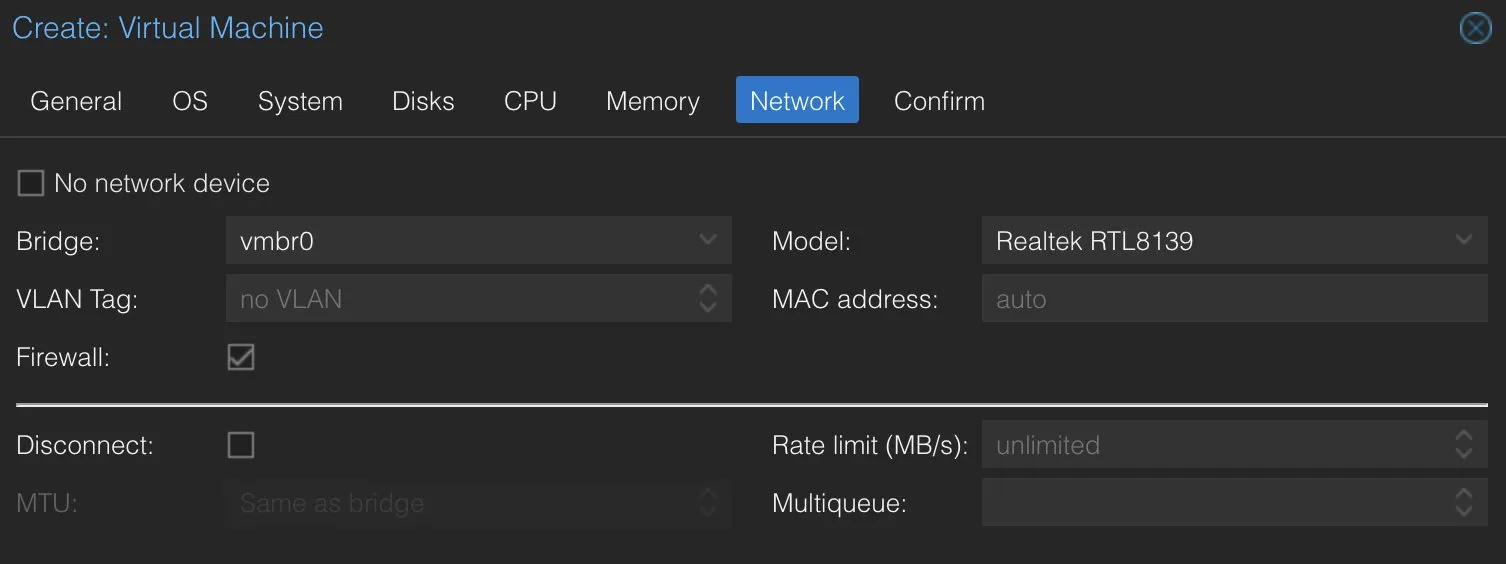
For the network, use model RTL8139 for now so we can get past the Windows Installer. Once we install the VirtIO drivers, we can switch it to VirtIO (paravirtualized)
Now click next, and create your VM!
Add the GPU
Select the VM you just created. Go to the Hardware Tab. Click Add > PCI Device.
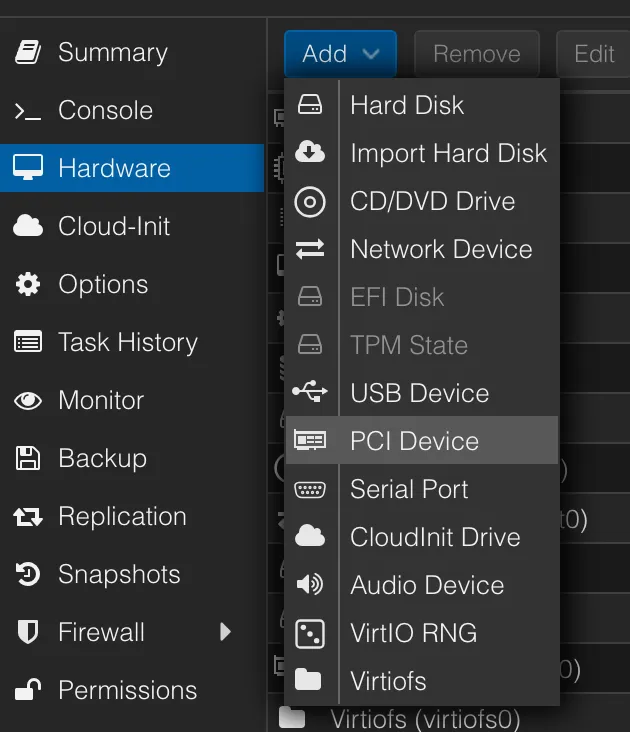
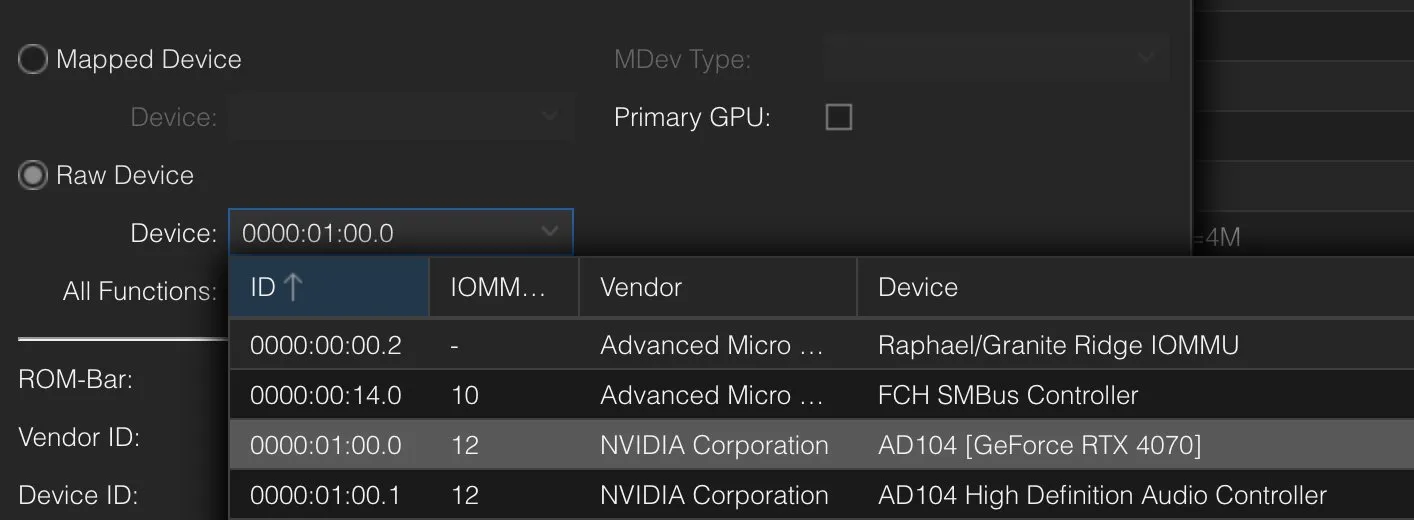
From there, select “Raw Device” and click on the dropdown. You should see 2 entries for your GPU; only select the actual card.
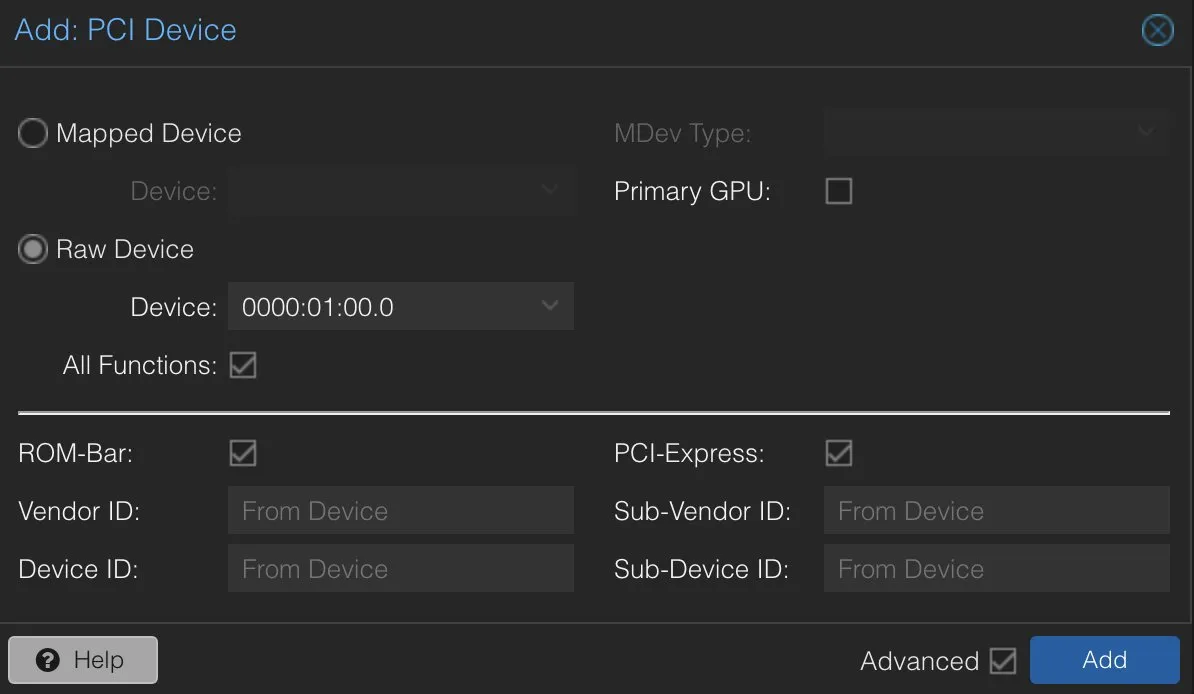
Select “All Functions”, this will add the audio device that was listed earlier. Do not set it as the primary GPU, as this will break Proxmox VNC. Then enable ROM-BAR and PCI-Express, and click add!
Install Windows
Just boot up the VM, and install Windows as you normally would
Install Drivers
Assuming the install went according to plan, you should be on your Windows desktop through the Proxmox VNC.
We need to now install some drivers, this is pretty straightforward, so im not going into much detail.
- Open Edge. Download, install, and make default, Google Chrome. (optional but recommended)
- Download and install the VirtIO drivers from here. You can check the Wiki for different install methods if needed.
- Download the NVIDIA App and install the drivers.
Once everything is installed, reboot, and you’re done! If you don’t plan on doing any game streaming, you can stop here.
Sunshine & VDD
Download the latest Windows installer exe of Sunshine from their github here. Once installed, open “Sunshine” from the Windows search or just go to https://localhost:47990
(if you haven’t already, I recommend that you assign the VM a static IP address)
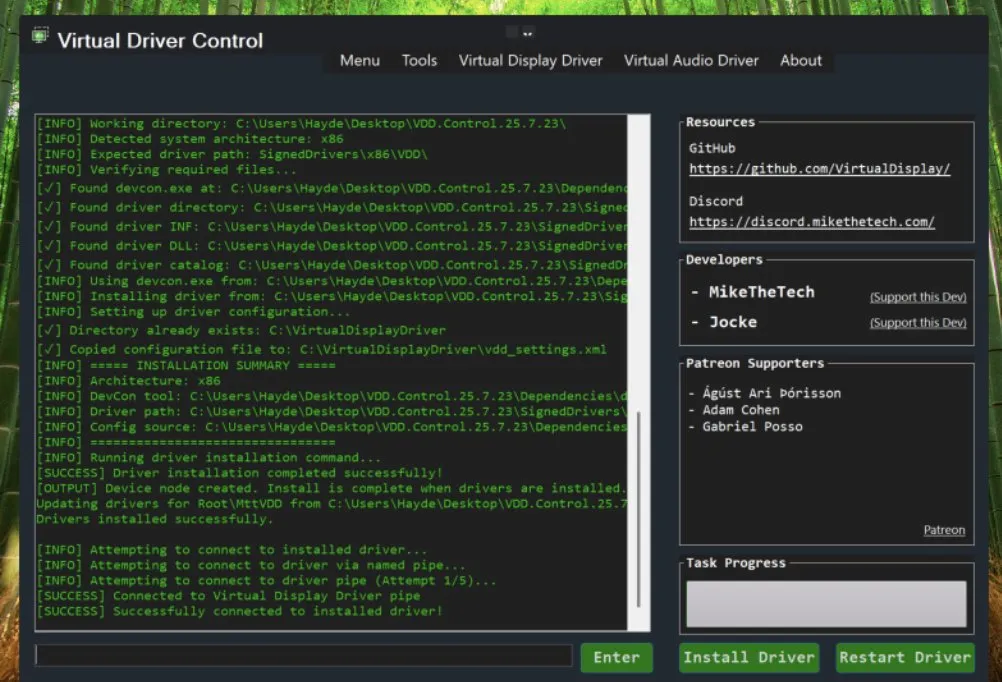
Sunshine needs an active display connected to the GPU for it to capture and stream. You can do this either with a real monitor plugged into your GPU, or, in my case, use Virtual-Display-Driver, which you can download from their github here. I installed “VDD-Control”; however, you can choose to install just the driver if you prefer.
Extract the zip file to your desktop and launch VDD control. From there, just click install driver, let it do its thing, and that’s literally it. You now have a virtual monitor connected to your GPU.
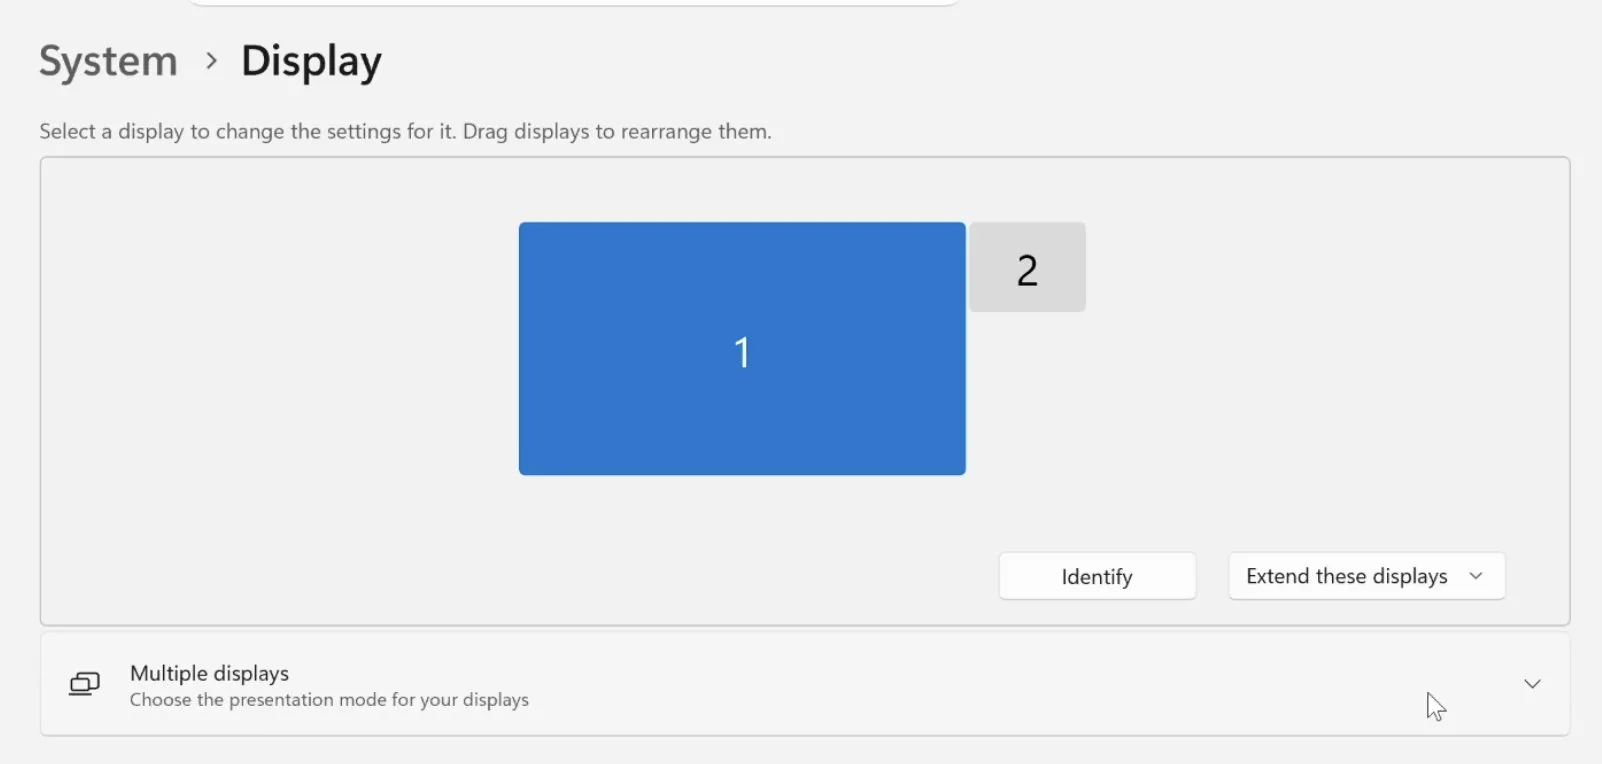
In the Windows settings, you should now see 2 monitors, one is your VNC session, and the other is the VDD device we just created:
All you need to do now is download the Moonlight client from their github here, connect to your VM, and it should just work!
However, when you initially connect to your VM from Moonlight, you are prompted to enter a code in the Sunshine web interface. To do this, you need access to the VM through Proxmox VNC, and usually sunshine will pick this display to capture instead of the VDD GPU display we made. You have two ways to fix this:
First, use the VNC to add your Moonlight client through the Sunshine WebUI, connect and verify that it works.
Shutdown the VM. In Proxmox, navigate to your VM > Hardware > Display and set it to none.
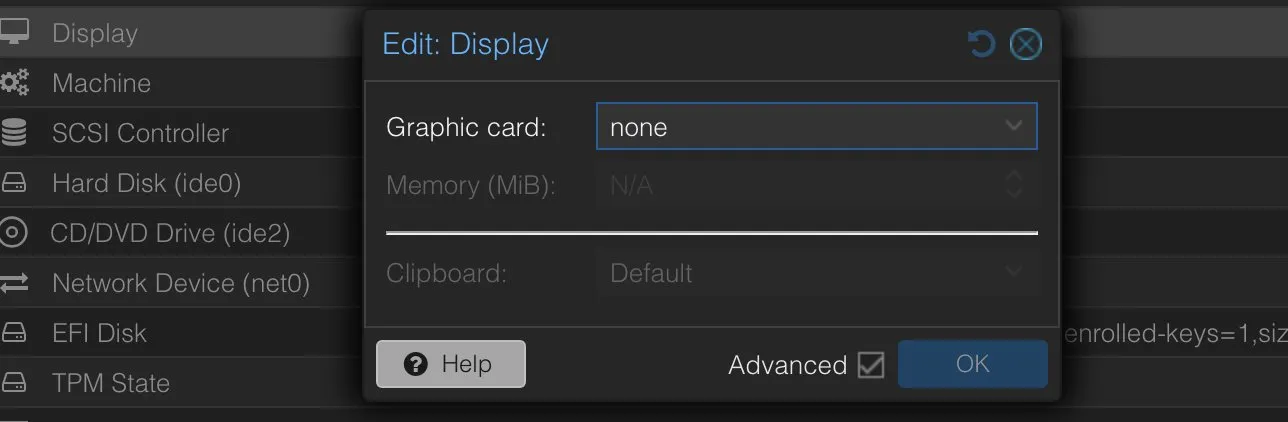
Start your VM again, connect to it from Moonlight, and it should automatically select the GPU as the display.
This works, but you will lose access to your VM through the Proxmox VNC, which, personally, I prefer to always have active for management. If you don’t care about that and just want to use Moonlight, then you can stop here.
To get the VNC working and still have Sunshine use the GPU, we need to manually set the Adapter Name and Display ID.
Start by opening up a terminal and running the following command:
& 'C:\Program Files\Sunshine\tools\dxgi-info.exe'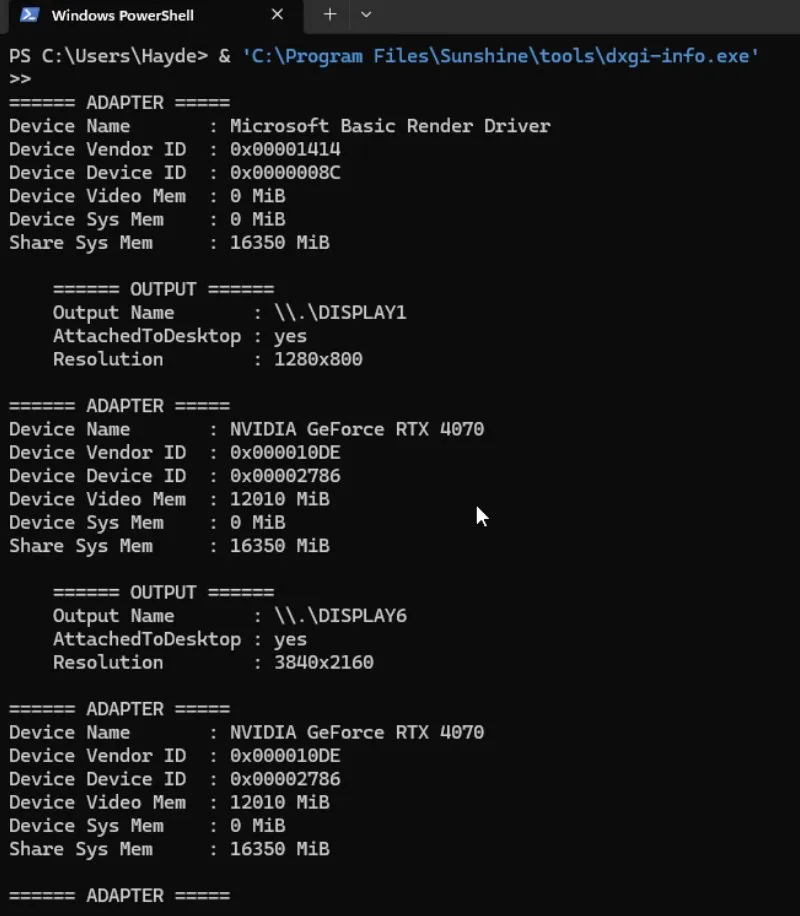
Take note of your GPUs “Device Name” and “Output Name”. Open the Sunshine WebUI and navigate to the “Troubleshooting” tab. Scroll down to logs, and copy the “device_id” of your display.
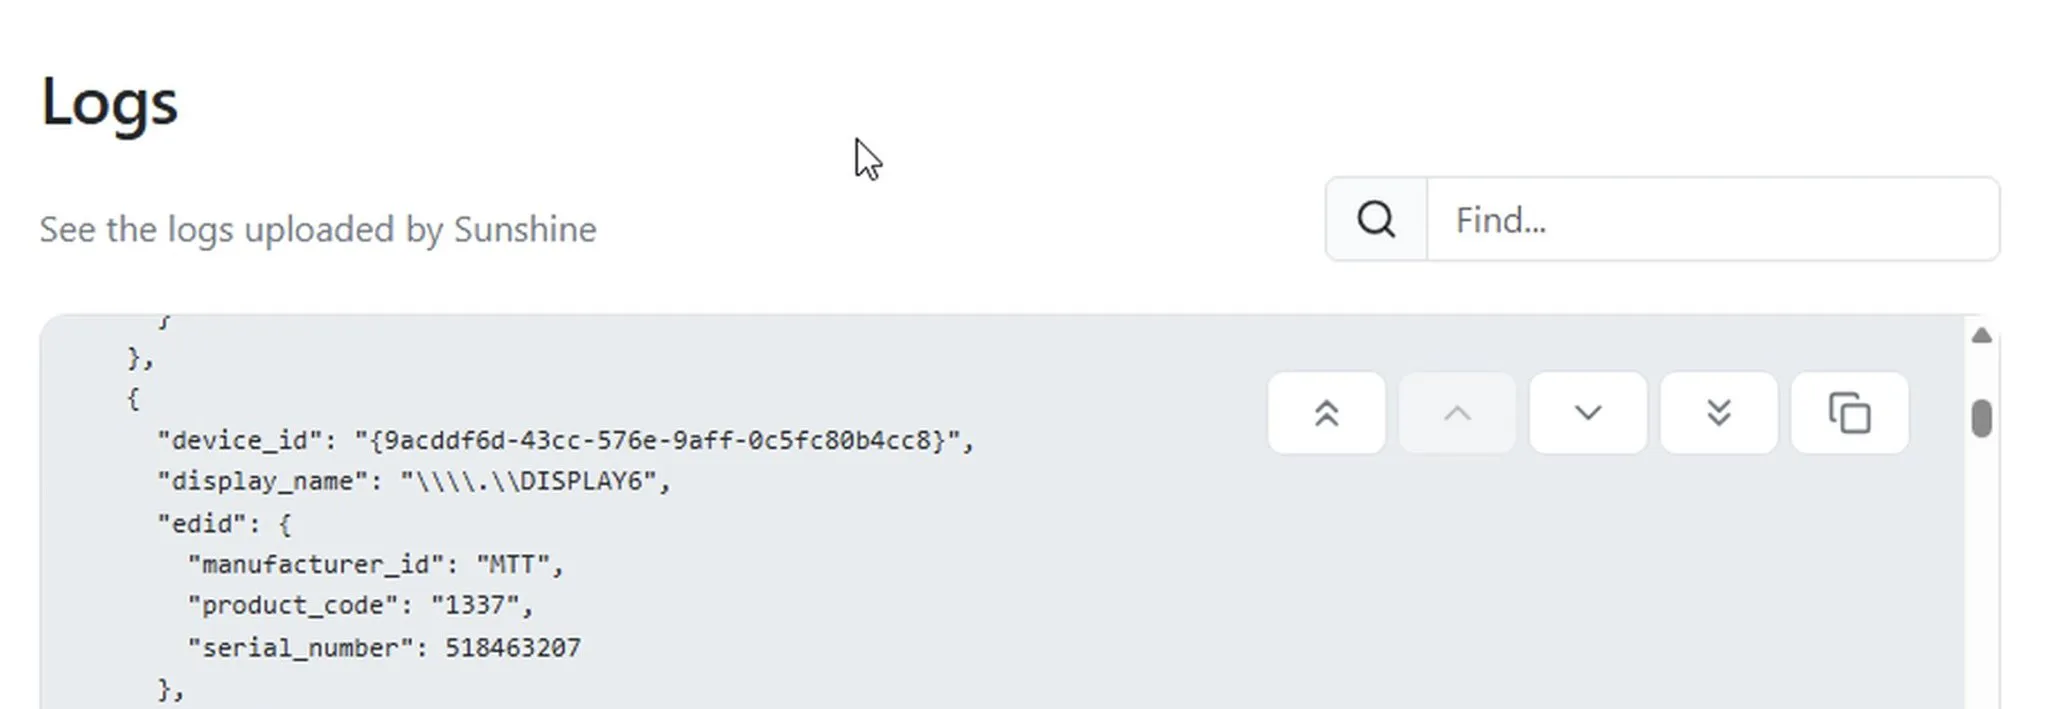
Go to the “Configuration” tab > Audio/Video and set the Device Name and Device ID fields.
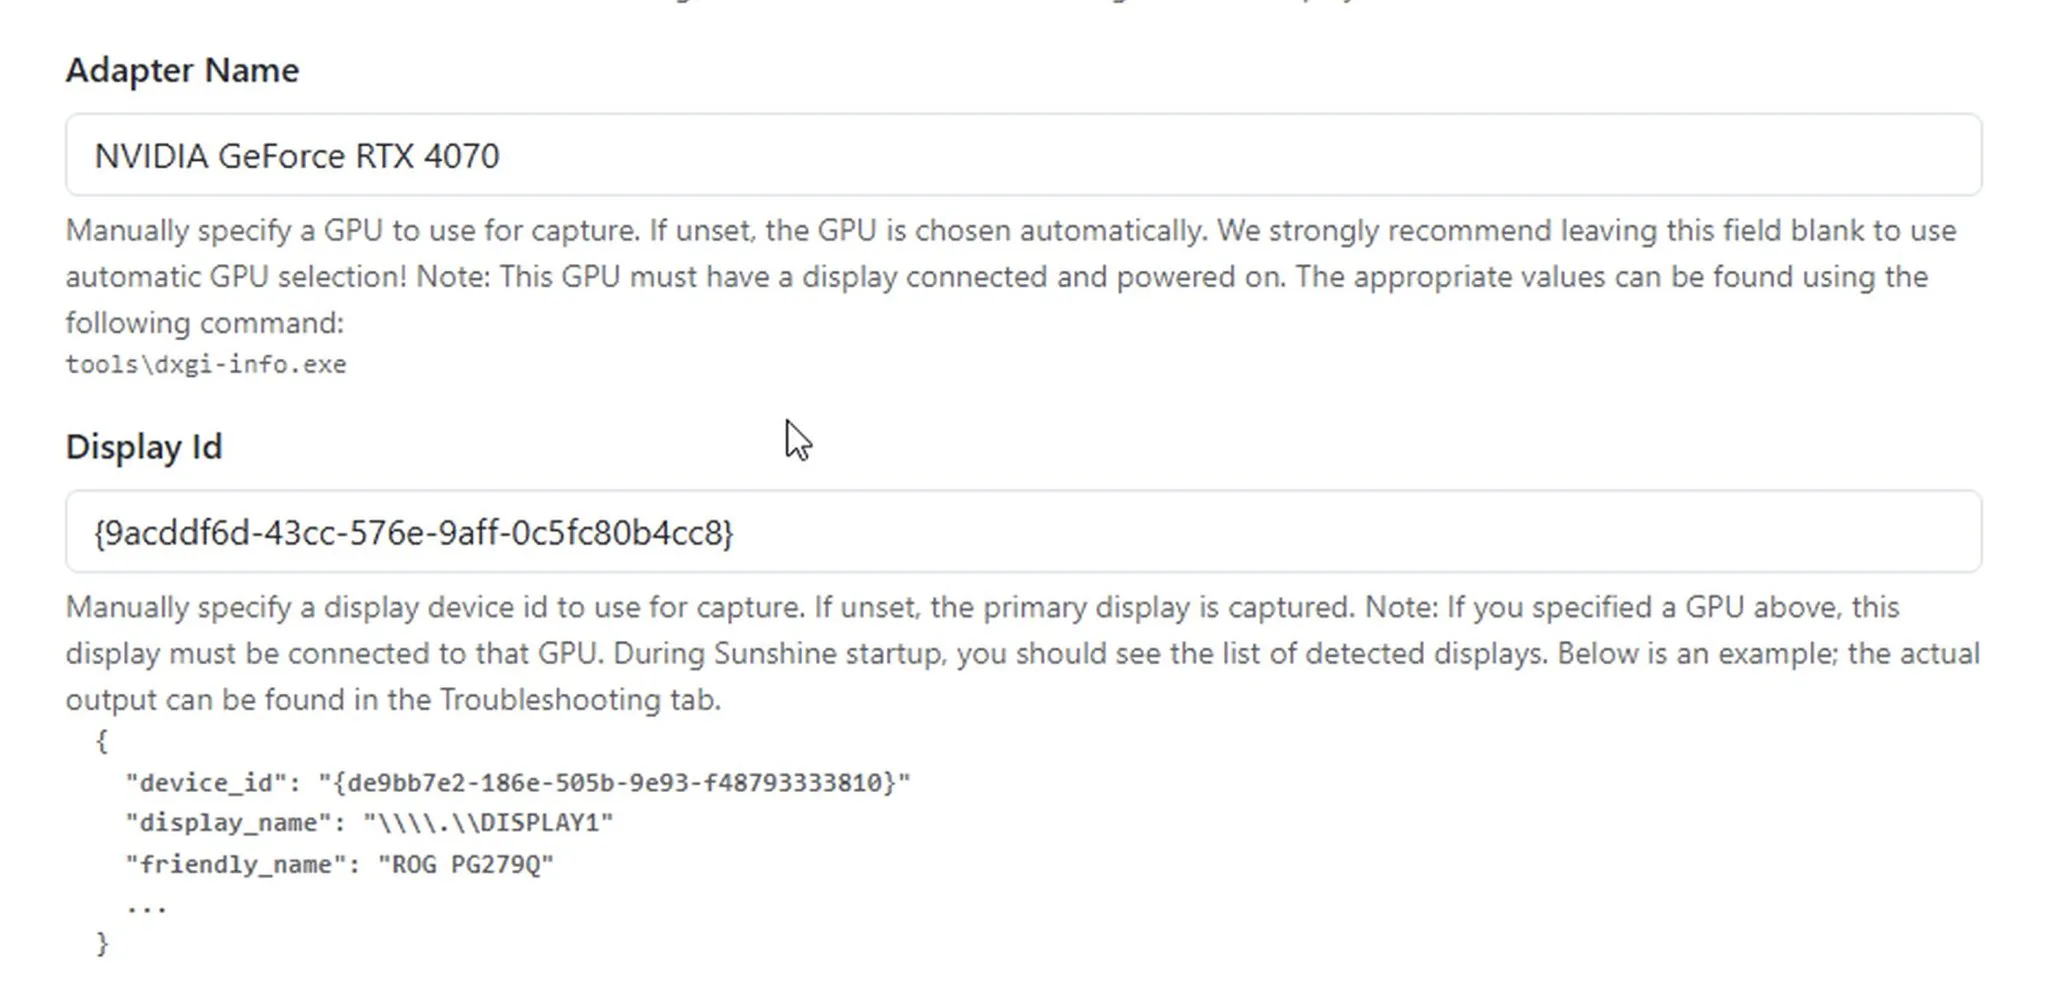
Then just save and apply. You can now use the VNC through Proxmox, and your GPU through Moonlight!
Originally posted on X.